
Safe And Easy Prenatal Yoga Poses for Each Trimester
21 Mar 2022 | 13 min Read
Reema Shah
Author | 740 Articles
It is important to take care of your physical and mental health during pregnancy. So right from your first trimester till the third trimester, prenatal Yoga poses help you build strength and keep you active.
They also help to ease your pregnancy symptoms while making you prepared to adapt to the myriad of changes that your body undergoes.
Before you do Yoga, make sure you have an anti-slip Yoga mat, a bottle of water to sip on and a proper space where you can focus well.
Read on to find out about the Yoga poses you can do during each trimester and what you should be careful about-
First-Trimester Yoga Poses
You can continue your regular physical activity when you enter your first trimester. But keep in mind to modify the poses appropriately. Go for poses that focus on the lower back and hips. Your aim should be to build strength and ease the tension off your body.
5 Yoga Poses you can Try during your First Semester
1. Butterfly Pose:
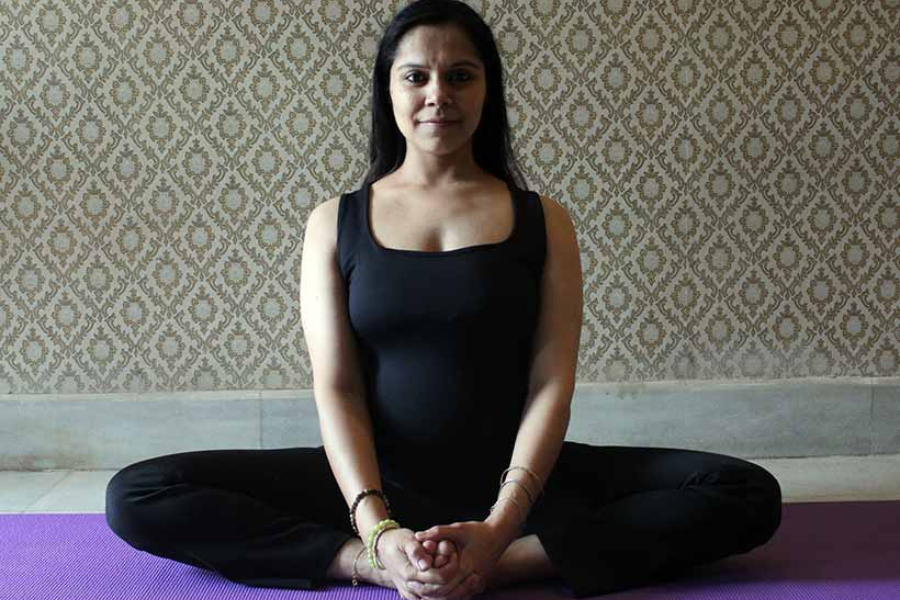
This pose stretches the muscles of the groin while opening up your hips. Your back will get a nice stretch as you fold forward.
How to do the Butterfly Pose:
a. Sit on your mat and bring the soles of the feet together while drawing them in towards the groin. Lengthen the spine while breathing in and fold forwards as you breathe out. Relax the neck and shoulders. You can even use a prop to support the upper body.
b. Try sliding your feet away from the groin if you are unable to fold forwards much as this will make more space to bend forwards.
2. Cobra Pose

The cobra pose helps to stretch the lower back while relieving back pain.
How to do the Cobra Pose
Lie down on the mat with your front body keeping your legs slightly apart. Spread your hands by pressing them down on the mat under your shoulders while inhaling to lift your chest. Stay for 3-5 breaths. Exhale while you release back onto the mat.
3. Puppy Pose
The puppy pose is great for mums who are feeling nauseous. It is a preparatory pose that you can do before the downward dog. It lengthens your spine and opens up the shoulder.
How to do the Puppy Pose
a. Keep your hips on top of the knees while staying on your all fours by walking your hands forward. Do this until your arms are stretched out straight out towards the front of the mat.
b. Press the mat away from your hands while spreading your fingers and lengthen the spine to reach out to your sitting bones.
c. Try lowering your forehead down to the mat if you can otherwise use a block.
4. Cat/Cow Pose
The cat and cow pose helps to relieve pressure on the lower back while stretching the spine. The muscles around the pelvis are also loosened.
How to do the Cat / Cow Pose
a. Place your hands and knees on the mat. Breathe in while lengthening your spine keeping it arched like a cow and look forwards.
2. Breathe out while rounding your spine in the cat pose and look towards your belly.
3. Repeat steps 1 and 2 for at least 10 rounds.
4. You can also move your hips and shoulders in circle motions while switching between cat/cow.
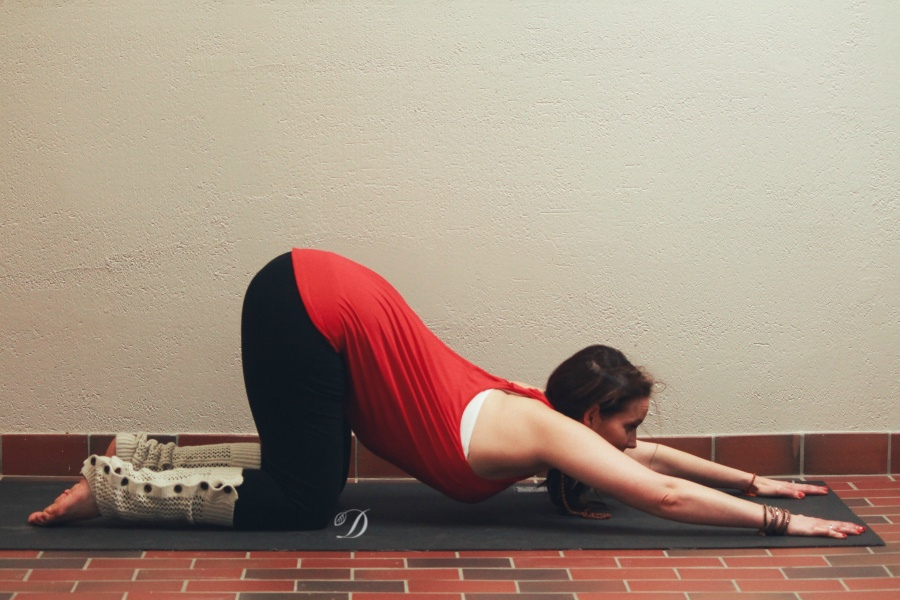
5. Child’s Pose
This is a resting pose that stretches the back muscles while lengthening the spine. It also helps to reduce stress and anxiety.
How to do the Child’s Pose:
a. Place your hands and knees on the mat. Keep the knees apart and wide while bringing your hips back towards your heels. Extend your arms out in front of you while resting your forehead on the mat.
b. Repeat this for five or more breaths until you are comfortable.
Second-Trimester Yoga Poses
During the second trimester, your body begins to produce a hormone called relaxin at higher levels. This prepares your body for birth while relaxing your muscles, ligaments and tendons.
While this change might make you more flexible, be very careful not to overstretch. Do not push your body limits.
5 Yoga poses you can try during your second semester-
1. Mountain Pose
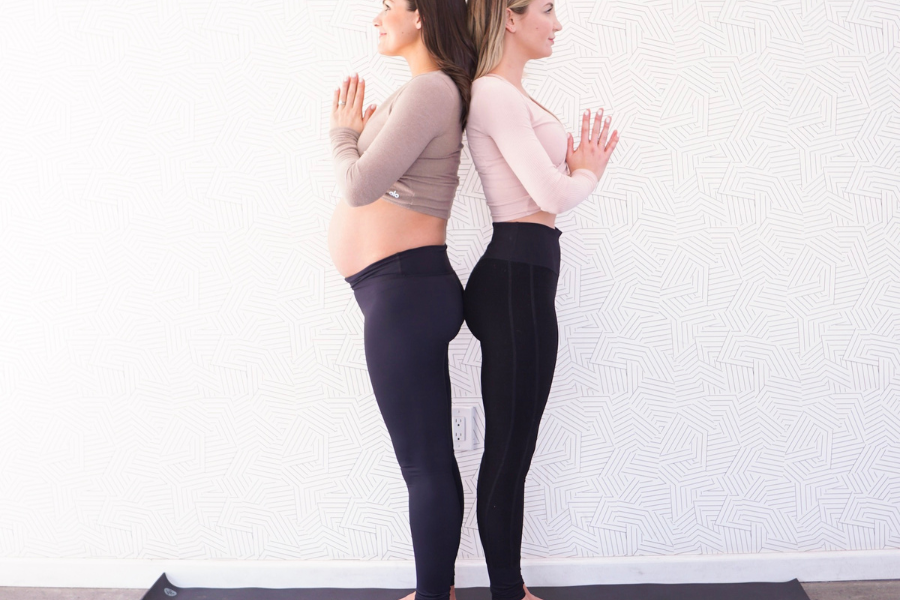
This basic pose is perfect for mums-to-be as it helps in the spinal and pelvic alignment. It also strengthens the glutes, thighs, knees and ankles.
How to do the Mountain Pose:
a. Stand up straight with your feet hip-width distance apart. Balance your weight evenly across both feet while you focus on toes, balls of the feet and heels. Bring the thighs and kneecaps upwards as you keep the feet on the ground.
b. Slowly draw the front ribs in while lengthening the tailbone down towards the ground. Avoid overarching the back which can happen as the belly gets heavier.
c. Relax the shoulders while looking away from the ears and place the arms freely alongside the body. You can also place one hand over the belly and the other hand over the heart center. This helps you connect your heart to the womb while breathing. Hold the pose for about 5 to 10 breaths.
2. Warrior II
This pose helps to open up the inner thighs and strengthens the muscles of the legs which is great for active labour.
How to do Warrior II:
a. Breathe in while stepping the feet wide apart and take the arms out to either side. Turn your right foot towards the right and turn the left foot inwards at 90 degrees.
b. Breathe out, while bending your right knee and bring the right thigh lower to a comfortable level. Stretch out the right inner thigh in such a way that you can see your big toe while you look down. Do not let your right knee go beyond the right ankle.
c. Keep your shoulders aligned right above your hips. Extend your arms out straight while keeping your shoulders relaxed. Turn your head towards the right and look ahead from your right fingertips.
d. Breathe normally and hold the pose for 3 to 5 breaths.
e. Breathe in while straightening your right leg. Relax the arms and draw the right foot in. Repeat on the other side after taking a few breaths if you want to relax.
3. Extended Side Angle Pose
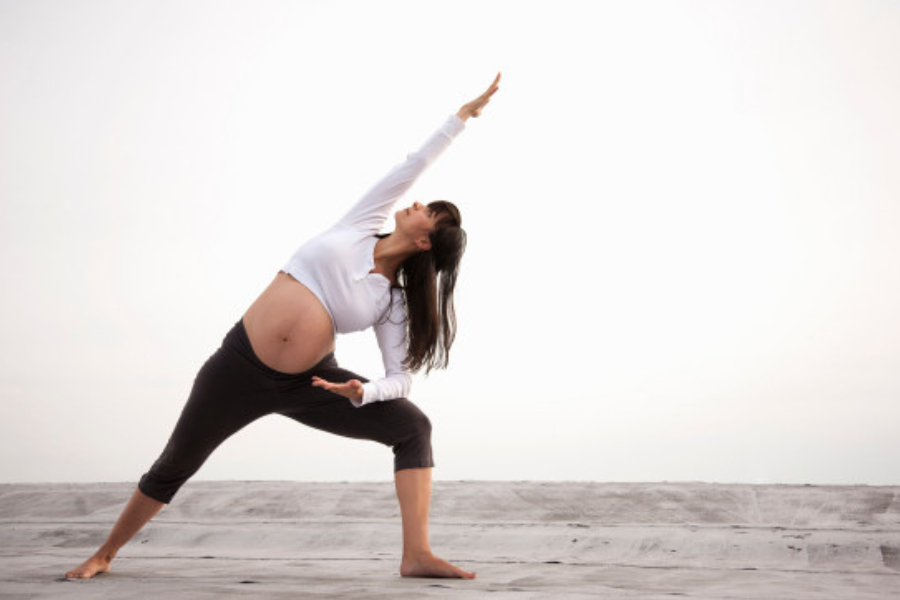
This pose stretches upper back muscles to the abdominal region. It also opens up the chest while letting you breathe deeper.
How to do Extended Side Angle Pose:
a. Breathe in while you are in the Warrior II pose and keep your right knee bent. While breathing out, place the right arm down to the right thigh. Raise your left arm straight up towards the ceiling and lean the left shoulder slightly backwards. Open up the chest as you stretch the left arm forwards and bring the bicep close to the left ear.
b. If your body allows, you can deepen the pose by bringing your right hand down to a block while keeping your chest open.
c. Stay in the pose for about 3 to 5 breaths.
d. Breathe in and come up while turning the right foot inwards. Then slowly lower the arms and take a break if needed before switching sides.
4. Balancing Table Pose
This pose helps you to focus better while improving balance and coordination. It also strengthens the core muscles which aids in supporting the baby’s growing weight.
How to Do Balancing Table Pose:
a. Place all fours on the mat while breathing in and stretch your right arm forward parallelly to the floor. Stretch your left leg back and lift it up, keeping them both at the hip level. You can keep your toes on the floor itself if you find it hard to balance the body.
b. Draw the front ribs inwards and lengthen the tailbone towards the back heel.
c. Breathe normally and stay in the pose for about 3 to 5 breaths.
d. Breathe out, while lowering both the hand and knee back to the mat. Repeat the same steps on the other side too.
5. Tree Pose
This is another great pose that you can try to build focus and concentration. This pose helps to make muscles in the legs, hips and back stronger. During pregnancy, this pose helps you to develop postural alignment along with your growing belly. This is crucial to maintain because the centre of gravity shifts in your body hence helping your body to stay aligned.
How to do the Tree Pose:
a. Stand in the mountain pose while you shift your weight slightly to your left foot and bend your right knee. Slowly move your right foot up till the left ankle. If you can balance, shift your right foot till your calf or inner thigh.
b. Strengthen the tailbone towards the ground and slowly balance by stretching out your front ribs.
c. Put both of your hands on your hips. If you are able to maintain balance you can try stretching out your arms straight up towards the ceiling.
d. Focus on a fixed point right in front of you and breathe freely as you hold the pose for about 3 to 5 breaths. Bring your right foot down and repeat the same step on the other leg.
Third-trimester Yoga Poses
During your third trimester your baby takes up more space which might hinder your body movements and you can face challenges in breathing too during Yoga. So do not take any pressure and just move easily and gently. Also take plenty of rest.
Here are 5 Yoga poses you can try during your third semester-
1. Goddess Pose
This powerful Yoga pose helps you to feel the powerful maternal vibrations. It helps to open up the hips while building strength and challenging the mind.
How to do the Goddess Pose
a. Step your feet wide apart as much as you can along the length of your mat, while pointing your toes outwards.
b. Slowly bend your knees and make way for your tailbone to go downwards while ensuring they don’t go beyond your toes.
c. You can rest your arms on your thighs if you are comfortable, else place your arms in a prayer gesture with your palms turned in the upward direction. Take about 5-7 cycles of breath while staying low in this pose before you straighten your legs and slowly step back your feet together.
2. Savasana II (On Your Back)
This pose allows a deeper relaxation while focusing on your body from head to toe.
How to do the Savasana II Pose
a. Take two blocks or thick pillows to sit with your bottom at the edge. Let your knees fall outwards on either of the sides while bringing the soles of your feet together.
b. Slowly lower your back on the incline you created using the props as a support. Relax in this pose for 5-10 minutes.
3. Bridge Pose
The bridge pose elevates your hips so they temporarily reduce the pressure off your pelvic bowl. When your baby is growing, the additional water retention in your body makes your body heavy!
How to do the Bridge Pose
a. Lie down flat on the mat and with the help of your fingertips, reach towards your feet. Bend both of your legs and keep the soles of your feet grounded while maintaining a hip-width apart distance.
b. Lift your hips slowly by taking support of your spine. Your spine should be extending from your thighs till your shoulders. Breathe and hold the pose for 3-5 cycles each. Then lower your hips back to the mat.
4. Legs Up the Wall

This pose uses gravity to let the blood flow back to your heart. Hence it can help in reducing the swelling in the feet and ankles.
How to do the Legs Up The Wall Pose
a. Start by placing a pillow, or folded blanket against the wall.
b. Sit on the left side of your props and keep your knees stacked to the left while placing your bottom as close as you can to the wall.
c. Slowly incline your lower body to your left side and then with the support of your prop, roll your bottom on it.
d. You will have to move your hips back until they touch the wall. Relax while you stretch your legs up while keeping it hip-distance apart. Stay in this position for about 6-8 cycles of breath before you incline back by rolling onto your left side. Then push yourself back to gradually come to a seated position.
Squat Pose
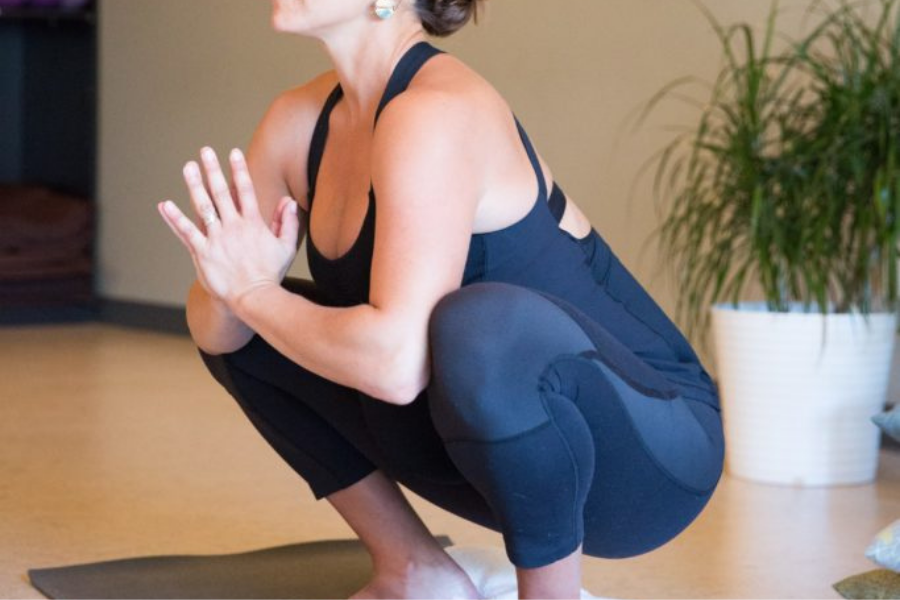
This pose allows for a deeper hip opening while strengthening your pelvic floor. It is one of those prenatal Yoga poses that allow you to experiment with the position of giving birth to your baby. However, please note that you should avoid squatting if your baby is in the breech position.
How to do the Squat Pose
a. Step your feet slightly wider than hip-distance apart. Keep your toes pointed slightly outwards.
b. Then join your hands in a prayer gesture as you inhale and lift up with your pelvic floor as you exhale.
c. Continue to engage your pelvic floor and slowly lower down your hips towards the floor. For up to 5-7 cycles of breath, stay low in this pose. Then use your hands for support to slowly straighten your torso and knees.
As you move to each trimester and engage yourself in Yoga, keep these things in mind-
- Do not do intense forward bends, backbends and twists
- Stop hot Yoga or do not try it
- Do not try poses that cause strain or lead to forced abdominal contractions
- Avoid inversions unless you are experienced
- Bouncing or jumping should also be avoided
Yoga can help relax both the body and mind while easing back pain when practised regularly. You can try Yoga early in the morning or at night to relax after a long day.
With Yoga, the spine stays strong which is vital in supporting digestion and breathing. In case of any physical condition or injury, do consult with your doctor to avoid any risk of injuries during pregnancy.
A

Suggestions offered by doctors on BabyChakra are of advisory nature i.e., for educational and informational purposes only. Content posted on, created for, or compiled by BabyChakra is not intended or designed to replace your doctor's independent judgment about any symptom, condition, or the appropriateness or risks of a procedure or treatment for a given person.